
Introduction
In today’s complex cloud environments, managing password security across multiple tenants is a critical challenge for IT administrators. Microsoft Entra ID provides powerful mechanisms to implement centralized password policies, but effective implementation requires careful planning and robust automation.
Graph API
Microsoft Graph API revolutionizes Entra ID tenant management by providing a powerful automation framework that simplifies complex multi-tenant configurations. With this API, you can effortlessly streamline identity and security management through comprehensive bulk operations, including:
- Automated user creation
- Efficient group management
- Privileged Identity Management (PIM) role assignments
- Granular password policy enforcement
The API’s finely tuned permission model lets you stay in control with precision, ensuring every automation script aligns with the principle of least privilege. This not only keeps your operations smooth but also fortifies your identity infrastructure’s security. By embracing Microsoft Graph API, you can shift from time-consuming manual processes to efficient, repeatable workflows that boost consistency and cut down on administrative overhead. Sounds like a win, right? Let’s explore how to make it happen.
The requirements
Before diving into the implementation, ensure you have:
- An IDE (such as Visual Studio Code)
- Entra ID Premium license
- Azure DevOps access with sufficient permissions
- Service connection(s) that have the Authentication Policy Administrator permission
- Proficiency in PowerShell
- Azure PowerShell module
- Microsoft Graph module
With these prerequisites ready, you’re all set to start building automated solutions that simplify your tenant management.
Scope
Today we will focus on the following subjects:
- Centralizing banned password management
- Supporting multi-tenant password restrictions
- Automating policy deployment through Azure DevOps
To prevent the blog from becoming too long, a few topics are out-of-scope:
- Multi-tenant deployment strategy
- Setting up Service Connections in Azure DevOps
- Creating branch policies in Azure DevOps
- Various testing/error handling
Configuration steps
Before we dive into the code, I will summarize the order what we will do:
- Create/prepare the required payload (body) files for the API
- Draft a PowerShell script to update the settings in Entra ID
- Create a YAML-pipeline for Azure DevOps that runs automatically
In the end you will have a basic automated way to update Banned Password Lists in multiple Entra ID tenants!
Code Implementation
The code for this blog is hosted on my public Github repository
Folder structure
To be able to create multi-tenant deployments, we are going to parameterize the banned password list settings per tenant. Therefore, we need a consistent folder structure to support this type of deployment.
| |
Uri background
To set the banned password list, we need to update the Entra ID setting ‘Password Rule Settings’. This one is currently in beta only, so as always be aware things may change in the future. See the docs for more information
The uri is:
| |
Getting the settings returns the following setting types:
| |
The API Uri targets ‘settings’, which is manages multiples EntraID settings. Therefore, we target ‘Password Rule Settings’ to validate we use the correct template ID to use in our Uri. This will become clear in the PowerShell code snippet below.
Create/prepare the required payload (body) files for the API
The Password Rule Settings expects a JSON-file body (passwordSettings.json) that contains the settings to update. The file has the following structure:
| |
You may be thinking: we don’t I add all the banned passwords in this file? A valid point, however we want to support multiple tenants we the ability to differentiate. Therefore, I chose to use separate files containing the banned passwords for each tenant.
Banned passwords
Each tenant will have a JSON-file containing the list of banned passwords. The file will be merged with the main parameter file and the merged file will be added as body to the request.
bannedPasswords-tenantA.json:
| |
Quirky body
What do I mean with ‘quirky’ body? The fact that the propert BannedPasswordList expects tab-separated values instead of comma-separated values. This will need to be taken into account in the PowerShell script.
PowerShell script
I will break down the PowerShell script in the following steps:
- Create a function to execute API operations on the ‘settings’ endpoint using an access token
- Combine the banned password list with the parameter file
- Update the settings in Entra ID
Let’s initialize the script:
| |
Now we declare the function to update the EntraID settings via the beta endpoint:
| |
Now we update the banned password list values of the parameter file:
| |
After this we have successfully created a new JSON-file containing the entire configuration (parameters). This file will be used as body in the next step, where we present it to our previously written function:
| |
Azure DevOps YAML Pipeline
The pipeline is where the magic sauce comes into play. Make sure you have service connections setup to the various tenants you wish to manage. For each tenant you can add a separate stage, as per the example below. Because this is a small configuration change, the pipeline is not that complicated to set up. First let’s add the correct trigger:
| |
Triggering on the branch and path makes sure the CI/CD runs as expected. You can add more checks before the first deployment stage, or better: add a test tenant stage to validate your configuration before pushing to production. Next we configure the pool, variables and stages of the pipeline. That’s all it needs to deploy on every commit to main in the designated feature parameter folder.
| |
Adding another tenant is as easy as copy-pasting the previous stage and changing the parameters:
| |
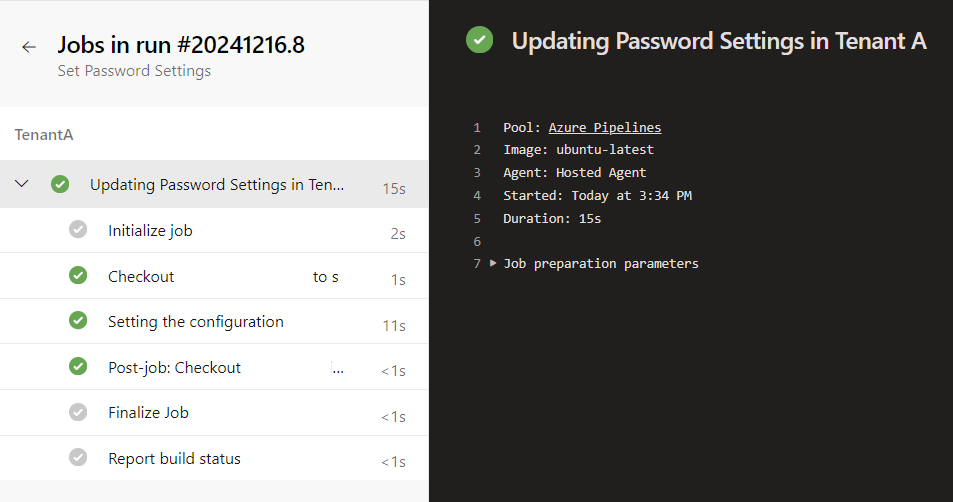
Running the pipeline
Let’s see what my pipeline does when I run it…
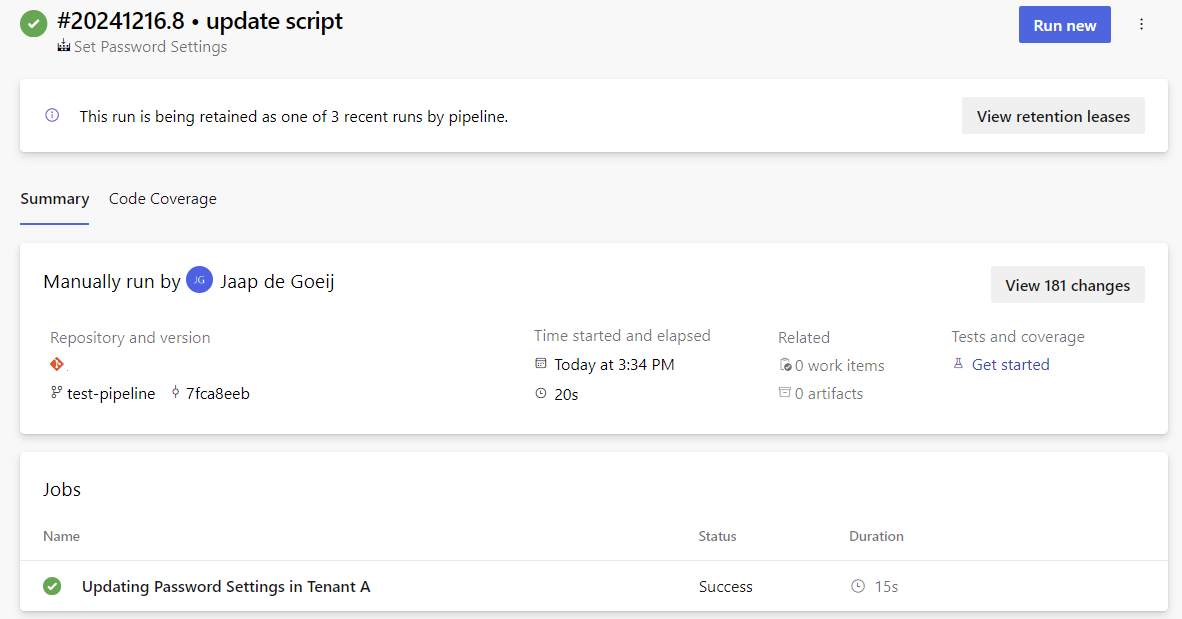
Success!
Potential Pitfalls and Best Practices
This setup makes you versatile in configuring banned passwords for your environment(s). As always, stay aware of the pitfalls:
- Ensure password policies align with specific tenant compliance requirements
- Always implement a 4-eyes principle approval workflow in your automation
- Test thoroughly in staged environments
- Regularly review banned password lists and update accordingly
- Implement comprehensive logging
- Use the principle of least privilege gor your automation accounts
Conclusion
That concludes this blog about configuring banned password lists via the Graph API with PowerShell. We have successfully:
✅ Created a folder structure for our files
✅ Wrote an intermediate PowerShell script, including a function, to configure the Entra ID settings.
✅ Added a YAML-pipeline to automatically deploy the code to Entra ID
Hopefully this provides you with a jump start into managing Entra ID(s) in an automated fashion. You can easily expand on this automation by adding new configuration of Entra ID like Conditional Access Policies or even PIM Eligible Role Assignments! As always, leave a comment in LinkedIN if you have any more questions. Happy coding! ☕