
In modern cloud environments, finding the right balance between workload autonomy and security control is crucial. While development teams need extensive permissions to manage their resources effectively, security teams must ensure these privileges don’t compromise the organization’s security posture. Azure’s conditional role assignments provide an elegant solution to this challenge, allowing us to grant broad permissions while maintaining strict security boundaries.
The Challenge
Traditional role-based access control (RBAC) often forces organizations to choose between two suboptimal approaches:
- Granting full Owner rights, risking security by allowing teams to escalate privileges
- Implementing restrictive custom roles, creating operational overhead and potential bottlenecks
Conditional role assignments offer a middle ground, enabling us to grant Owner permissions while preventing specific high-risk actions through conditions.
Understanding Role Assignment Conditions
Role assignment conditions in Azure add an extra layer of security by allowing us to specify when and how permissions can be used. These conditions are evaluated at runtime and can reference various attributes of the request context, including:
- The target resource’s properties
- The type of action being performed
- The principal’s claims
- The environment context
The power of conditions lies in their ability to create fine-grained access controls without sacrificing operational efficiency.
The requirements
Before implementing conditional role assignments, ensure you have:
- Access to Azure with permissions to manage role assignments
- Understanding of Azure RBAC and built-in roles
- Familiarity with Bicep or ARM templates
- Azure CLI or Azure PowerShell installed
- Bicep installed
Implementation Strategy
In this guide, we’ll focus on implementing a secure workload autonomy pattern with the following objectives:
- Grant Owner permissions to workload teams
- Prevent privilege escalation by blocking critical role assignments
- Maintain audit capabilities
- Implement the solution using Infrastructure as Code
Let’s dive into the technical implementation of these requirements.
Role Assignment Configuration
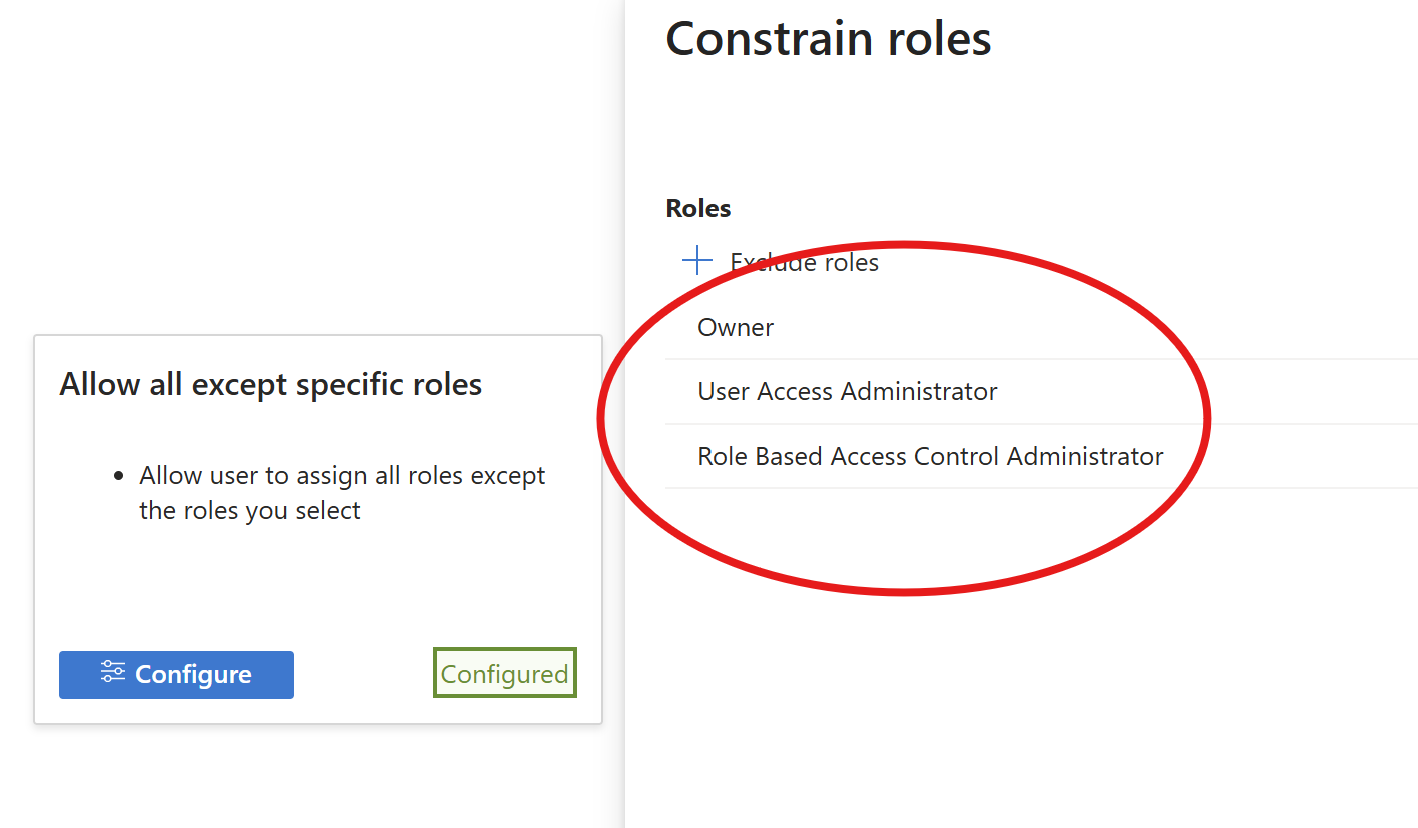
Here’s the critical part: we want to grant Owner permissions and at the same time prevent the assignment of privileged roles. We’ll achieve this by creating a role assignment with conditions that explicitly block assignments of the following roles:
| Role | GUID |
|---|---|
| Owner | 8e3af657-a8ff-443c-a75c-2fe8c4bcb635 |
| User Access Administrator | 18d7d88d-d35e-4fb5-a5c3-7773c20a72d9 |
| Role Based Access Control Administrator | f58310d9-a9f6-439a-9e8d-f62e7b41a168 |
Condition Syntax
The condition check whether the action the users performs is allowed. In this case, we prevent the user to create (write) of delete role assignments with the Role Definition ID’s of the above roles. All other roles are allowed to be assigned. You can play around and add other roles as well, or simply turn it around to only allow roles you define.
I use the triple quote to define a multi-line string (’’’):
| |
This condition ensures that even with Owner permissions, the user cannot grant or delete these privileged roles to/from others.
Bicep Implementation
Here’s how we implement this in Bicep:
| |
Permissions at Scale
When managing many subscriptions, resource groups, or resources, manual RBAC assignments become unmanageable. You need a repeatable, auditable, and secure way to grant and manage access ideally with the ability to:
- Assign roles to users, groups, or managed identities
- Apply conditions for least privilege
- Track and review assignments over time
Enter Azure Verified Modules (AVM)
The AVM Role Assignment module lets you declaratively manage role assignments at any scope. Let’s look at a practical example for assigning the Owner role at the subscription level, with a condition to prevent privilege escalation.
The bicep will look almost the same:
| |
Using the module for scaled operations
With the module, you can easily assign roles with conditions to multiple principals or scopes using a for loop in Bicep. This approach reduces duplication and minimizes the risk of errors.
For example, to assign the Owner role with the privilege escalation prevention condition to several user or group IDs you can pass an array of principals to process. The array will reside in a separate .bicepparam file.
| |
And the .bicepparam file will have the configuration for each principal you want to assign the permissions to. Remember you can always change the other parameters to include them in the bicepparam, like the assigned role etc. The way you can maximize your scaled operations!
| |
This pattern ensures each principal receives the correct assignment, and you only need to update the ownerPrincipals array to manage access at scale.
Testing and verification
I deployed the AVM bicep module with:
| |
Hint: you should use a pipeline for that, but that’s not part of this blog.
In the portal, I went to my subscription and checked the role assignments:

After clicking View/Edit I saw there was a configuration:
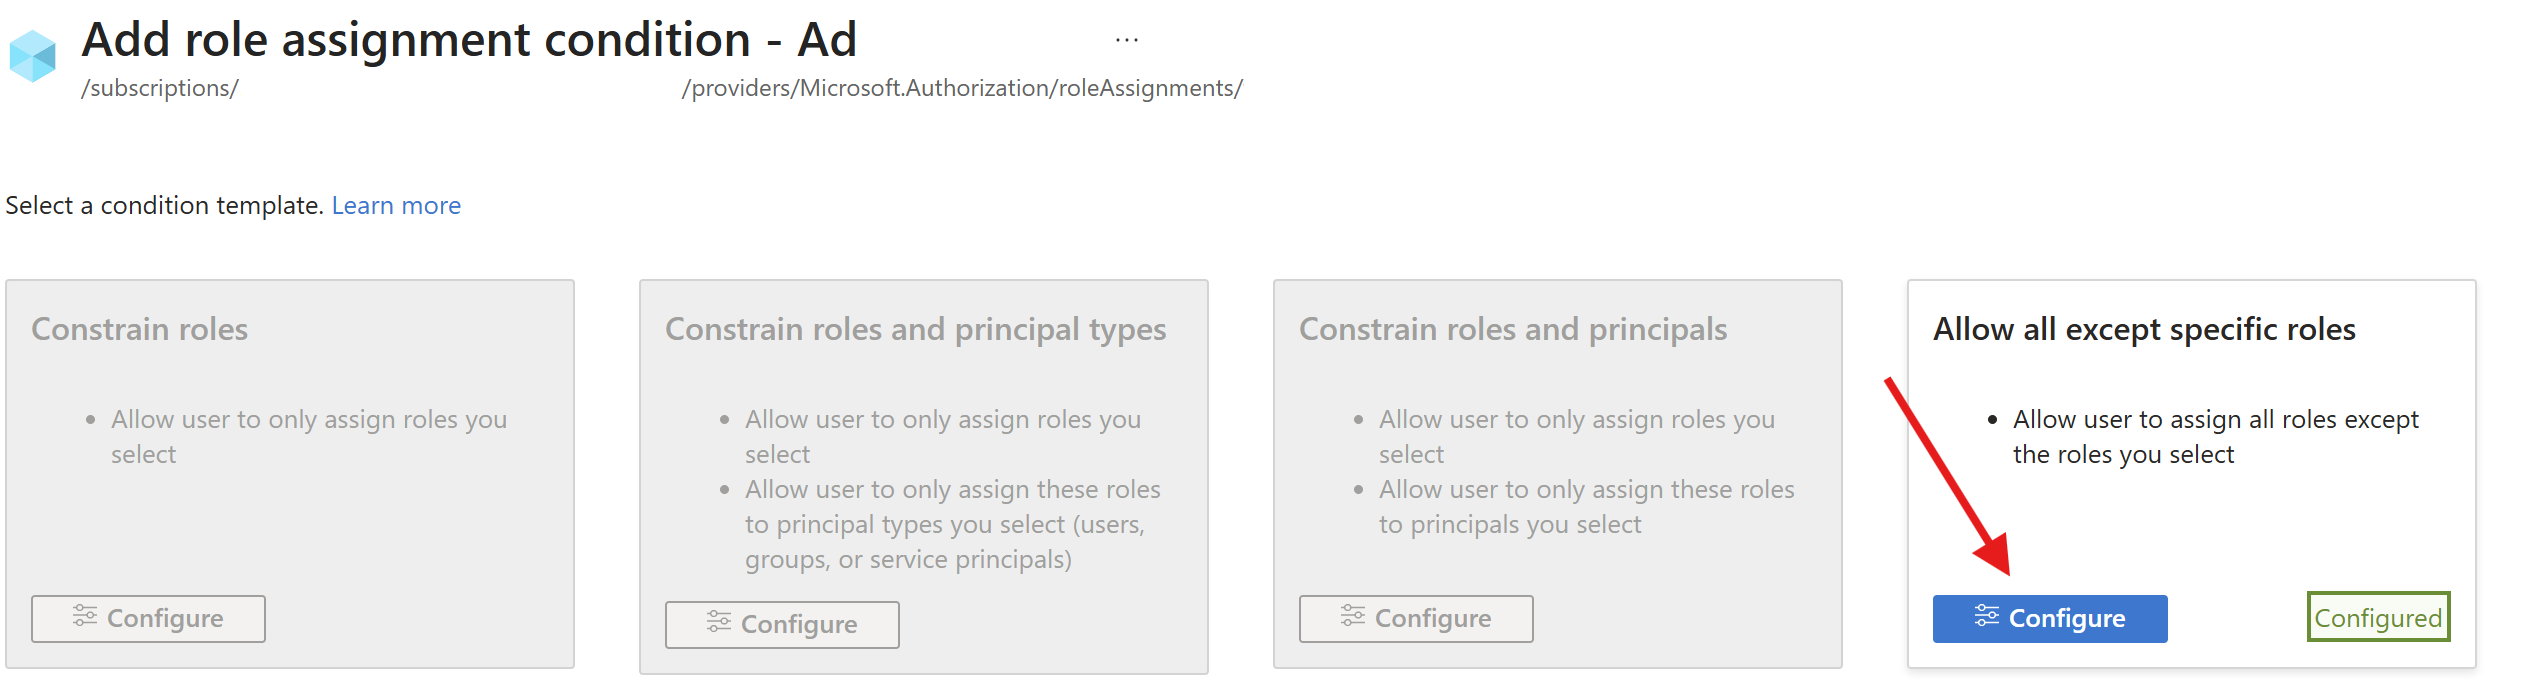
Then I checked the conditions:
Benefits and Considerations
This approach offers several advantages:
- Operational Efficiency: Teams are empowered to manage their own resources independently, reducing the need to request additional permissions from administrators.
- Enhanced Security: Sensitive role assignments are protected, minimizing the risk of privilege escalation and unauthorized access.
- Simplified Management: There’s no longer a need to create and maintain complex custom roles, streamlining access control.
- Scalable Solution: This approach can be easily implemented across many subscriptions, making it suitable for organizations of any size.
However, keep in mind that conditions add complexity to role assignments. Testing is crucial to ensure conditions work as expected. And always keep monitoring and auditing!
Compliance
So next time you need to report which privileged roles are assigned, you could simply use your codebase as proof! This multi-layered approach ensures both security and operational efficiency.
As always, leave a comment on LinkedIn if you have any questions. Happy coding! ☕