
Introduction
In this guide, we will delve into the intricacies of configuring Privileged Identity Management (PIM) Eligible Role Assignments on Azure subscriptions using the ARM API in PowerShell. As seasoned professionals, we recognize that leveraging PIM in Azure is a strategic imperative. However, as DevOps Engineers, we also acknowledge the challenges posed by incorporating Eligible role assignments into deployments. In this post I will expose all the intricacies concercing this piece of automation. Microsoft provides Micosoft Graph cmdlets for Entra ID PIM, but for Azure PIM Role Assignments you must use the Azure Resource Manager (ARM) API.
Before we dive into the details, I want to give a shout-out to my colleague Bjorn Peters. He did the refactoring of the JSON-body into a PowerShell object so it’s easier to manipulate the code. This provides with a cleaner looking script. Also check out his blog for interesting articles about Azure, DevOps and automation.
ARM API
As mentioned, Microsoft provides us with the Azure Resource Manager (ARM) API for configuring PIM assignments. While this API offers unparalleled flexibility, deciphering the precise configuration details can sometimes be like unraveling a labyrinth. In this blogpost I will provide code snippets, making automation of PIM eligible roles in your environment a breeze. As mentioned before, we will do everything in PowerShell including the body. Hopefully this will provide you with more insights on how to use the code snippets in your automation.
The requirements
- An IDE (such as Visual Studio Code)
- Proficiency in PowerShell
- Azure PowerShell module
- Microsoft Graph module
- Entra ID Premium license for PIM
- optional: Custom role definition
Configuration steps
PIM configuration exists of two steps:
- Define Role Settings: These settings determine when role activation occurs. Think of them as your compass.
- Create Eligible Role Assignments: This step associates roles with users or groups, allowing temporary permission elevation using PIM.
Custom Role Definitions
Scope Matters: When creating custom role definitions, consider the scope. If you intend to target multiple subscriptions, create the custom role definition at the highest possible level. Why? Because each role definition has its own unique GUID. If you create a new GUID for every subscription, your automation complexity increases significantly.
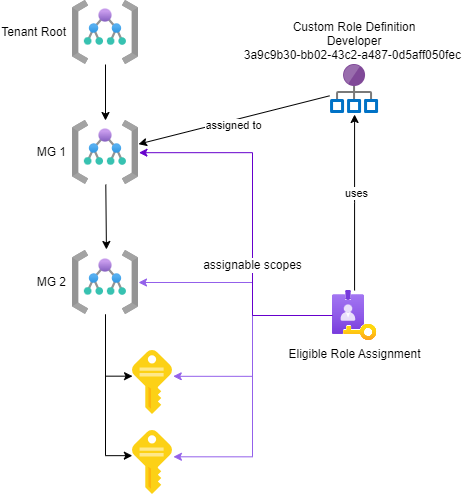
Example Scenario: Imagine an enterprise aiming to restrict developer access. They define a custom role called Developer with GUID 3a9c9b30-bb02-43c2-a487-0d5aff050fec. Now, they want to assign this custom role via PIM to different security groups across various subscriptions. In this case, it’s prudent to create the role definition at a higher level, ensuring consistent GUIDs for role assignments across different levels.
Remember these principles as you want to use custom role definitions within PIM. It will streamline your development processes.
Visualization of PIM a custom role definition:
Tasks
In this section we are going to execute the following tasks:
| no. | Task |
|---|---|
| 1. | Connect to the environment |
| 2. | Connect with MG Graph. Used for the creation of groups |
| 3. | Create 2 new security groups. 1 for PIM requests, 1 for approval of requests |
| 4. | Create a basic function to obtain headers. Used for making API calls |
| 5. | Store recurring values in objects |
| 6. | Update role policy with a custom role settings |
| 7. | Assign the eligible role |
In the end we are also going to test our setup.
Getting started
- Connect with you Azure environment
Connect-AzAccountto get started. - Connect with MG Graph with at least Group read/write permissions:
| |
- Create a new Security Group that will be assigned the PIM Eligible role:
| |
- Obtain headers. To be able to to execute calls to the ARM API we need to obtain the correct headers. We will wrap this in a function for easier use throughout the codebase:
| |
If we call the function and save the output in an object we can reuse the headers with every API call, like so:
| |
- Store reusable values in objects to use later and switch to the correct context. Find the role definition ID’s here.
| |
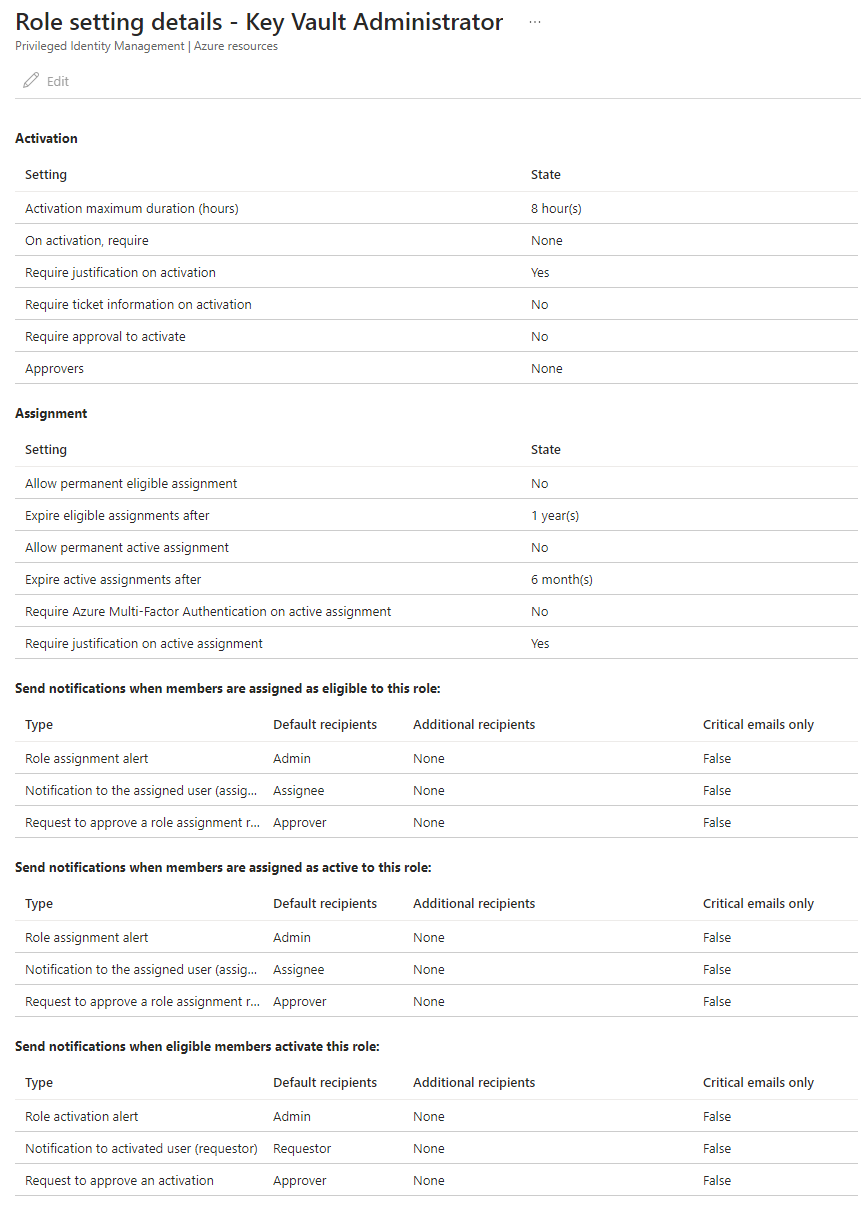
- Update the role policy so it requires an approval on activation.
| |
Now that we obtained the role policy, we need to create a body to update the policy to our liking. For reference checkout the docs. The body in PowerShell gives us more flexibility if we want to loop through multiple roles/groups/approvers etc. Here goes:
| |
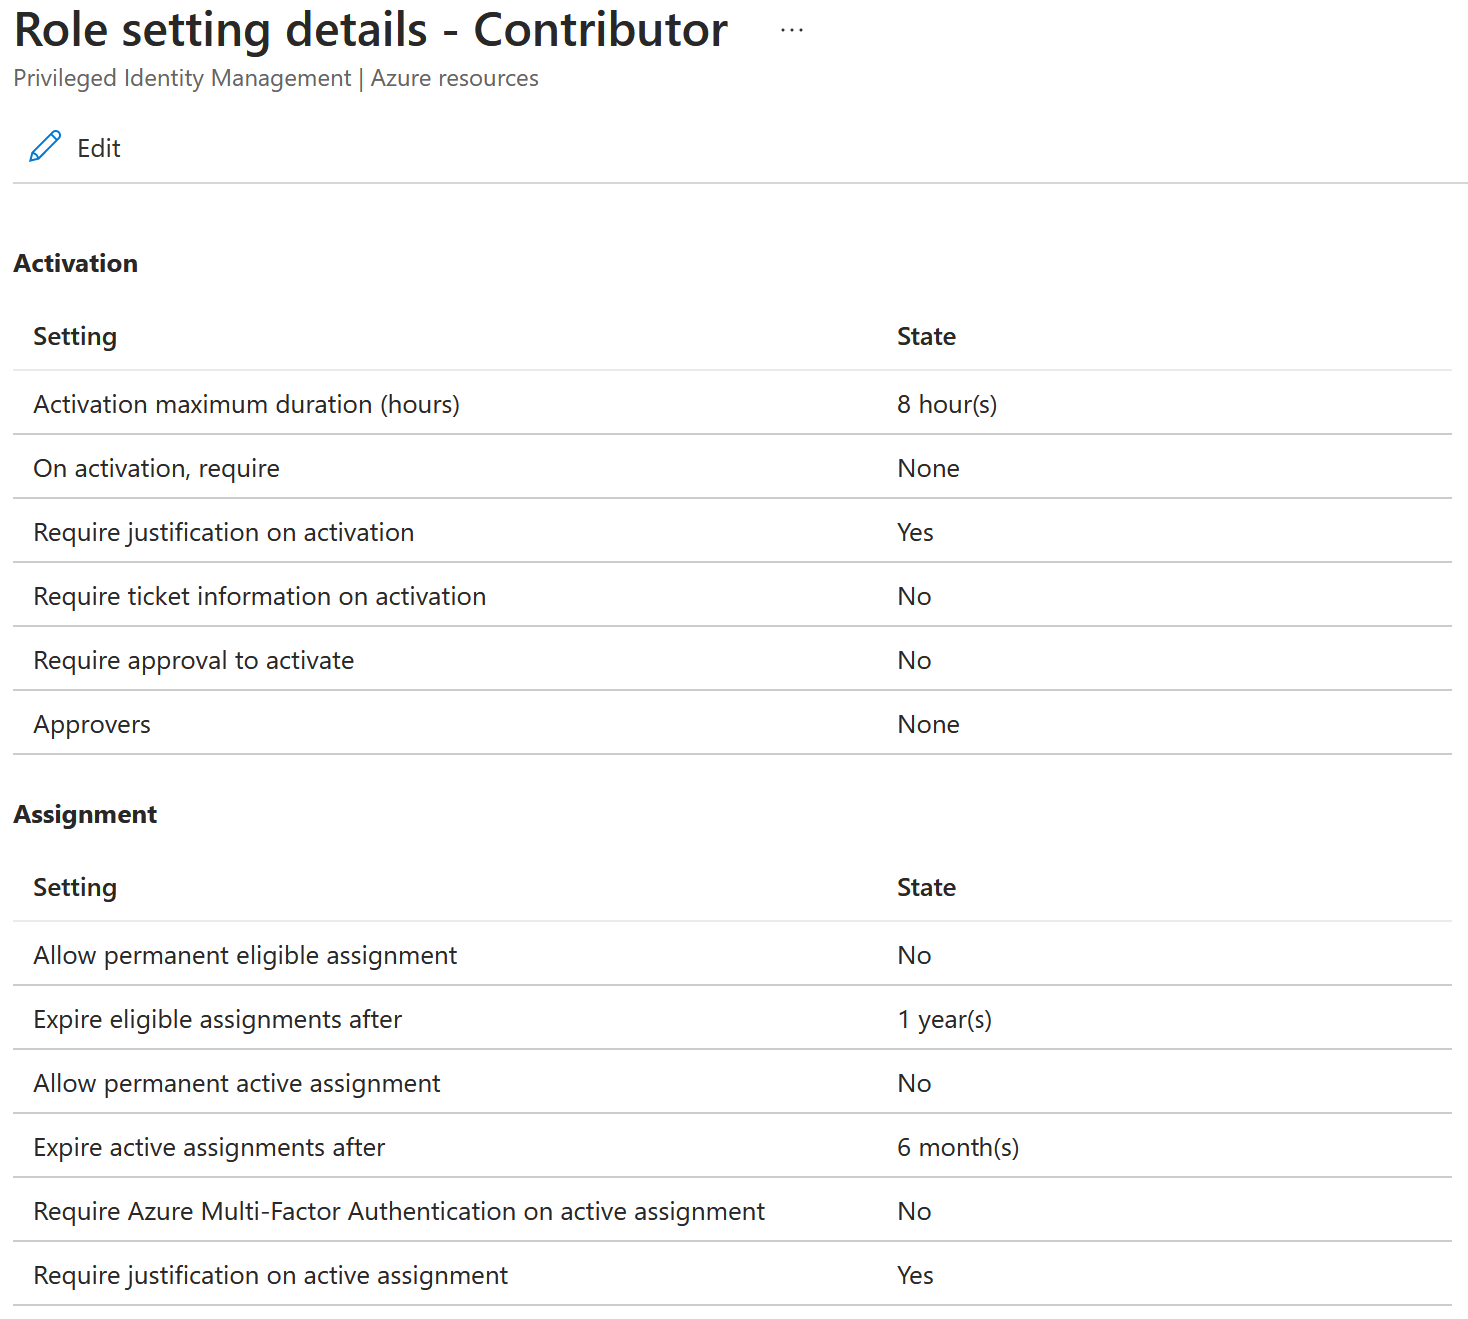
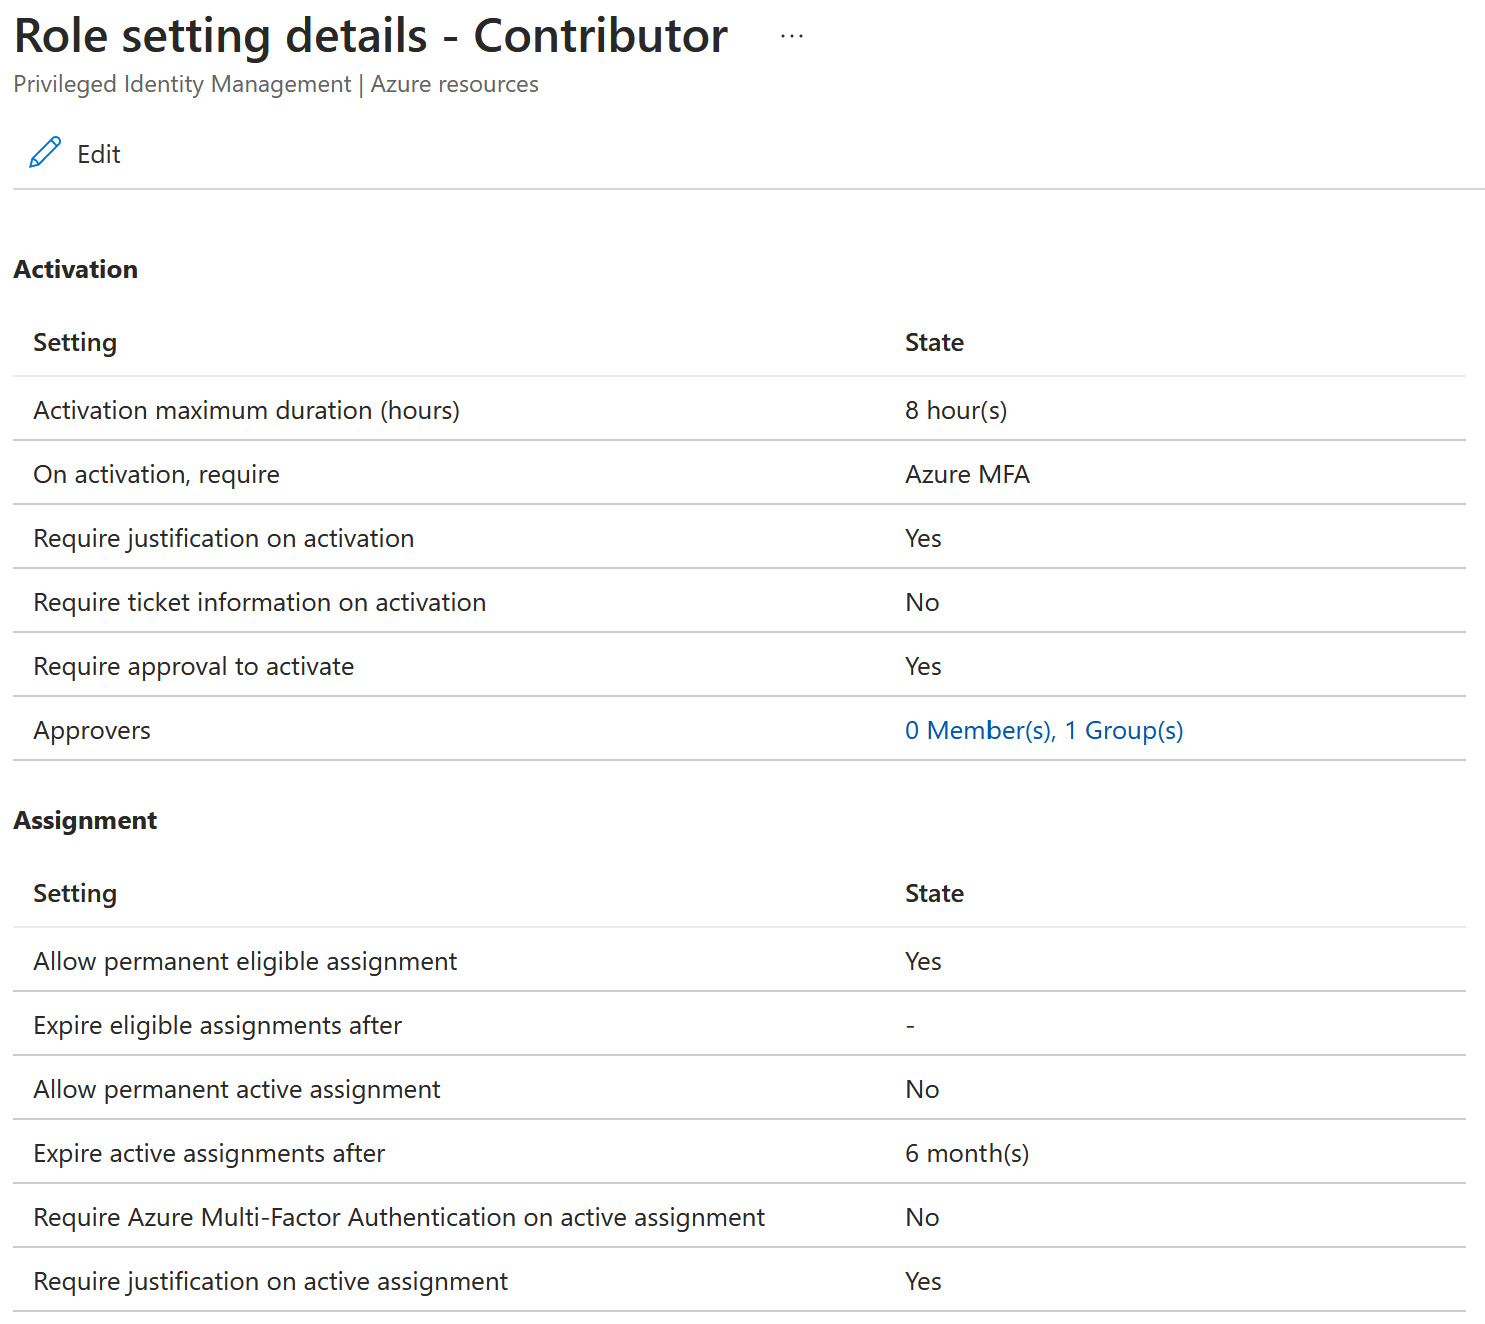
We have created the body, now it’s time to update the role policy! First we construct the Uri by inserting the Id we got from obtaining the role policy. Secondly we update the role policy by calling the API with a PATCH method. If all goes well the role policy should be updated.
| |
Before:
After:
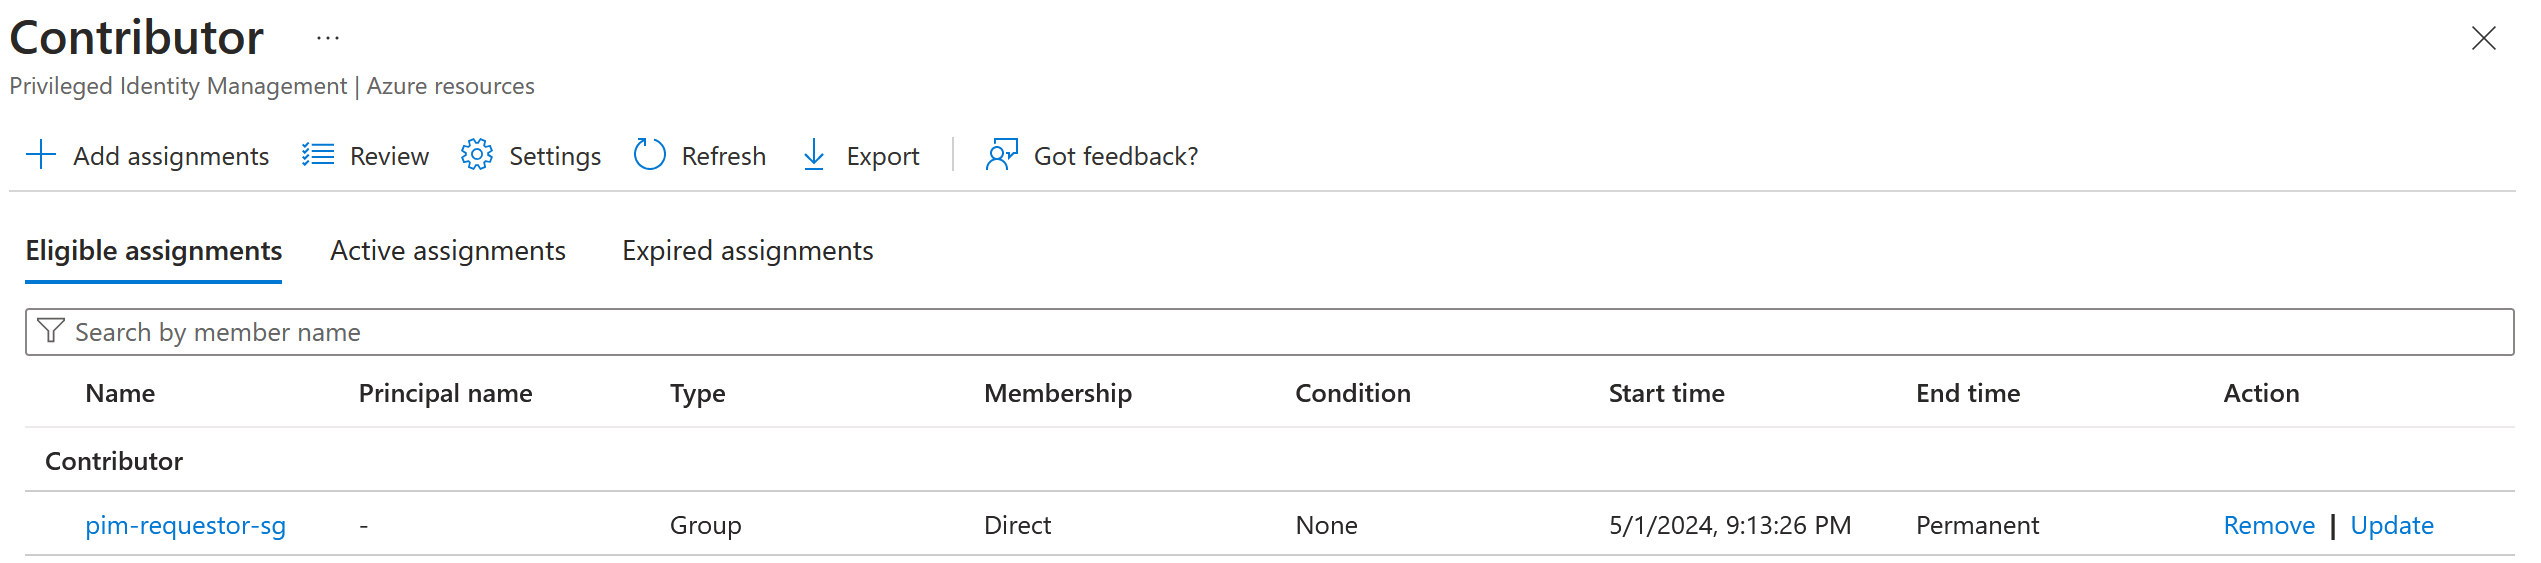
- Assign the Eligible role to the pimRequestorGroup Security Group:
| |
Result:
Testing!
All is now in place to test the setup. We followed the steps to create 2 security groups, update a role policy, assign the eligible role and finally we need to test this configuration:
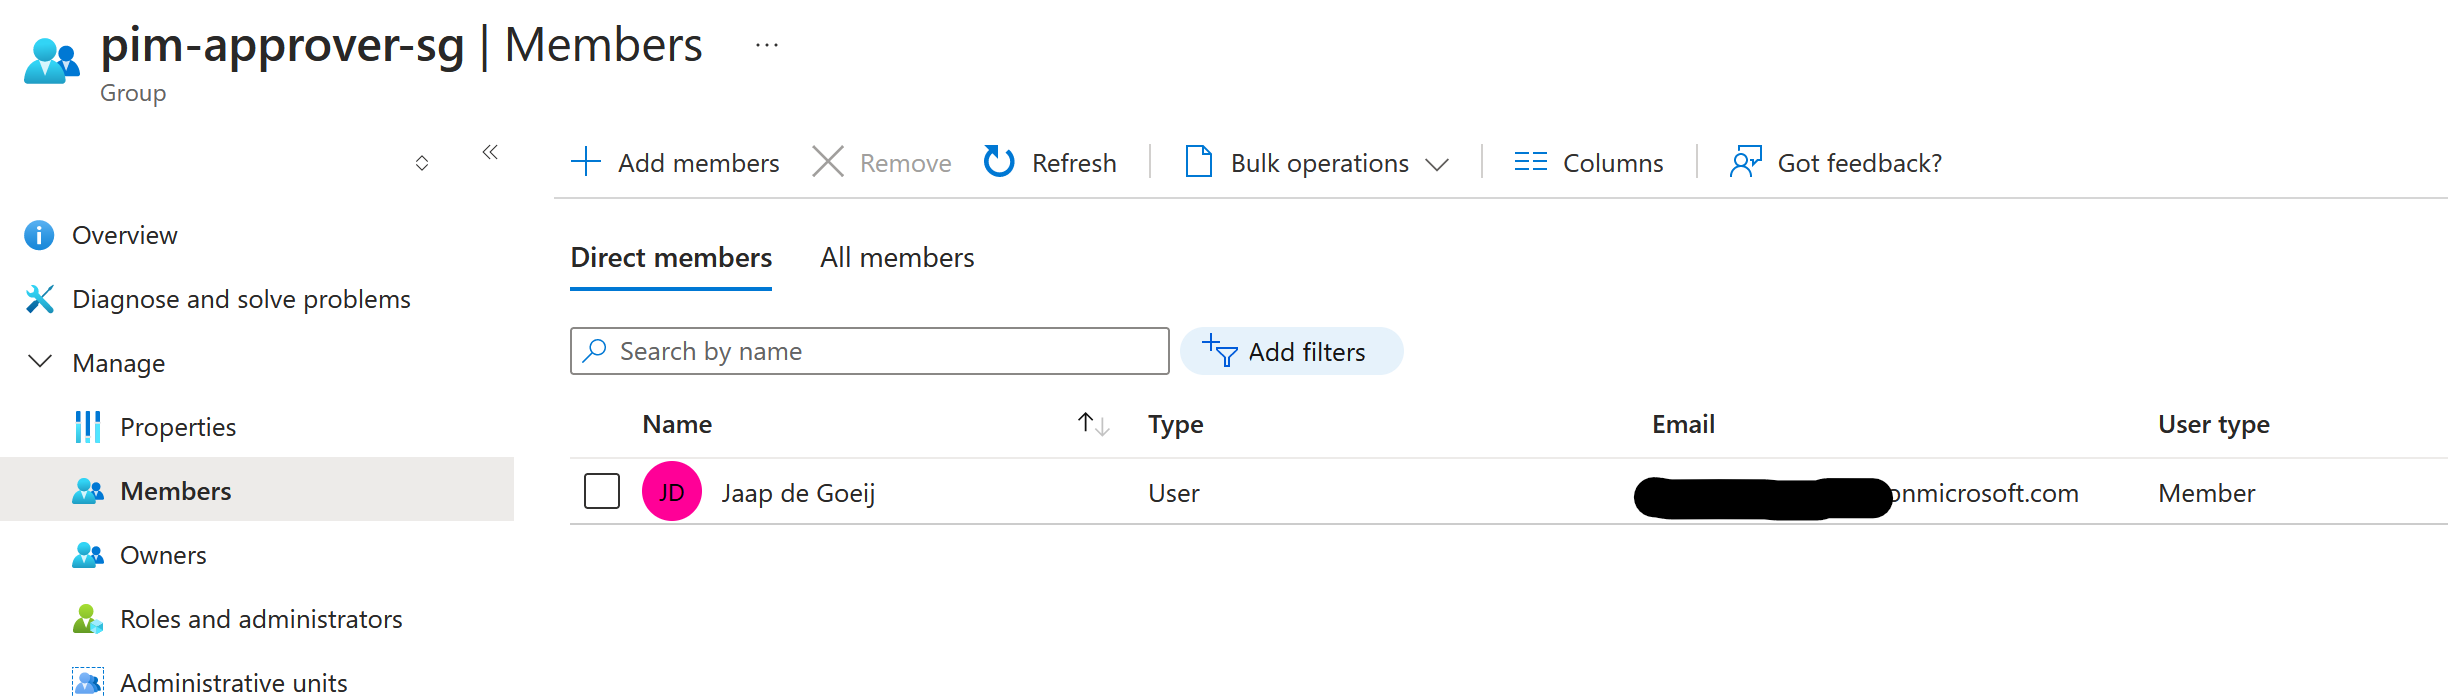
Group Membership
Add members to the created groups:
Remember, users cannot approve their own requests.
pimRequestorGroup: Users who can request activation of the Contributor role.

pimApprovalGroup: Approvers responsible for granting or denying requests.
Test the workflow
Test the setup with the separate accounts:
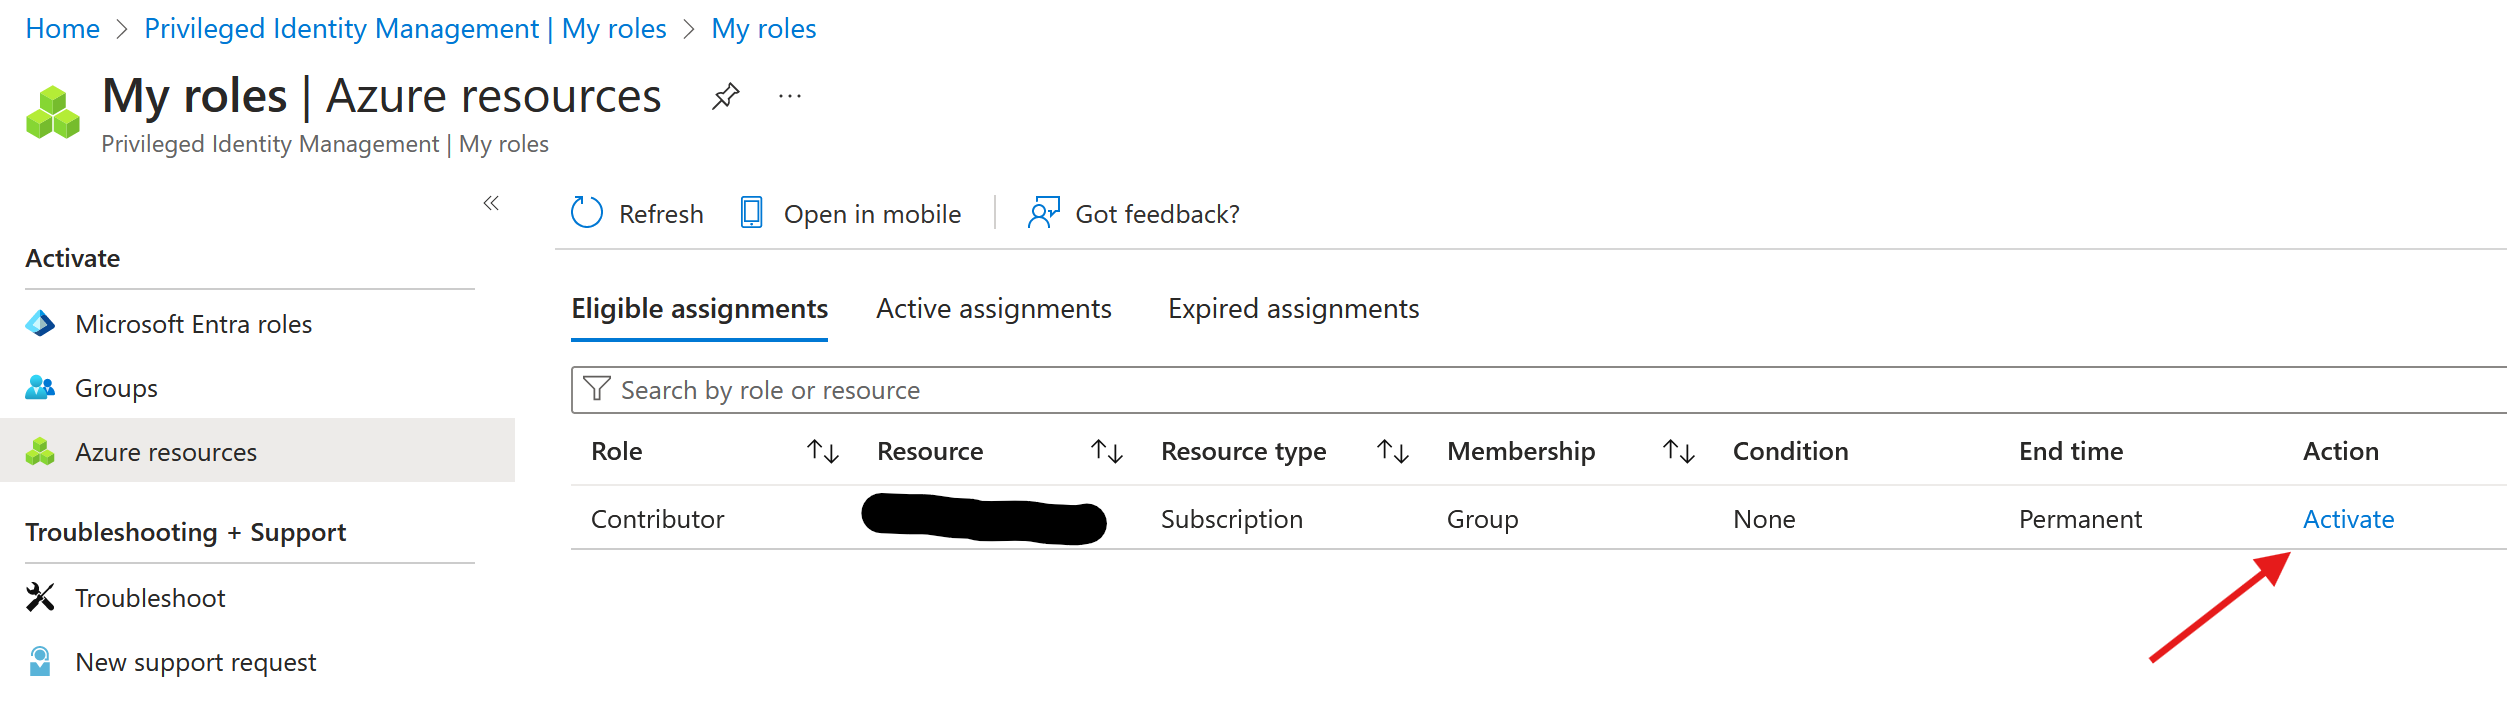
Requestor
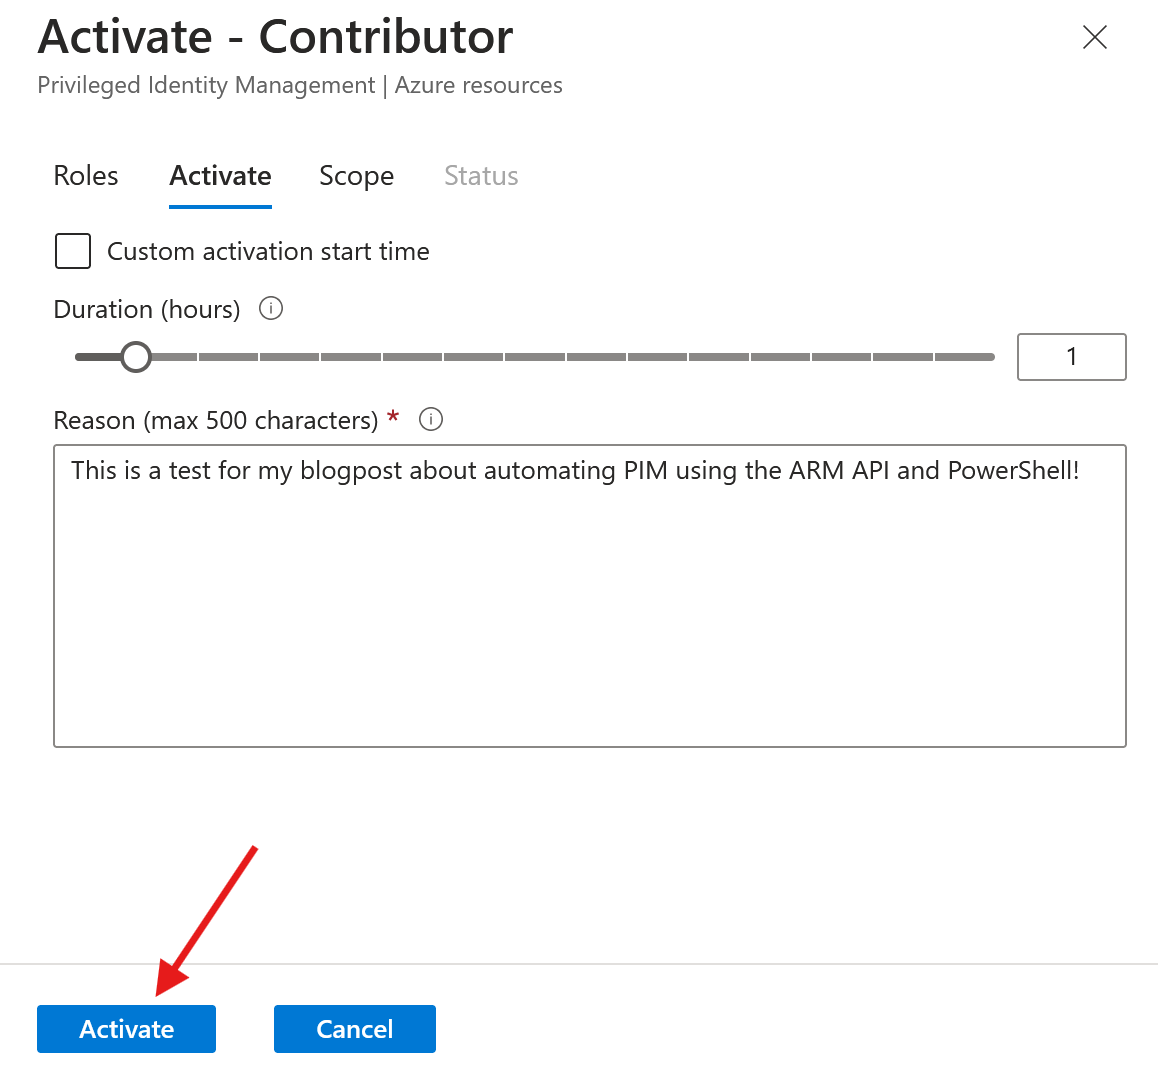
Make a PIM request:
Fill in the justification and hit ‘Submit’:
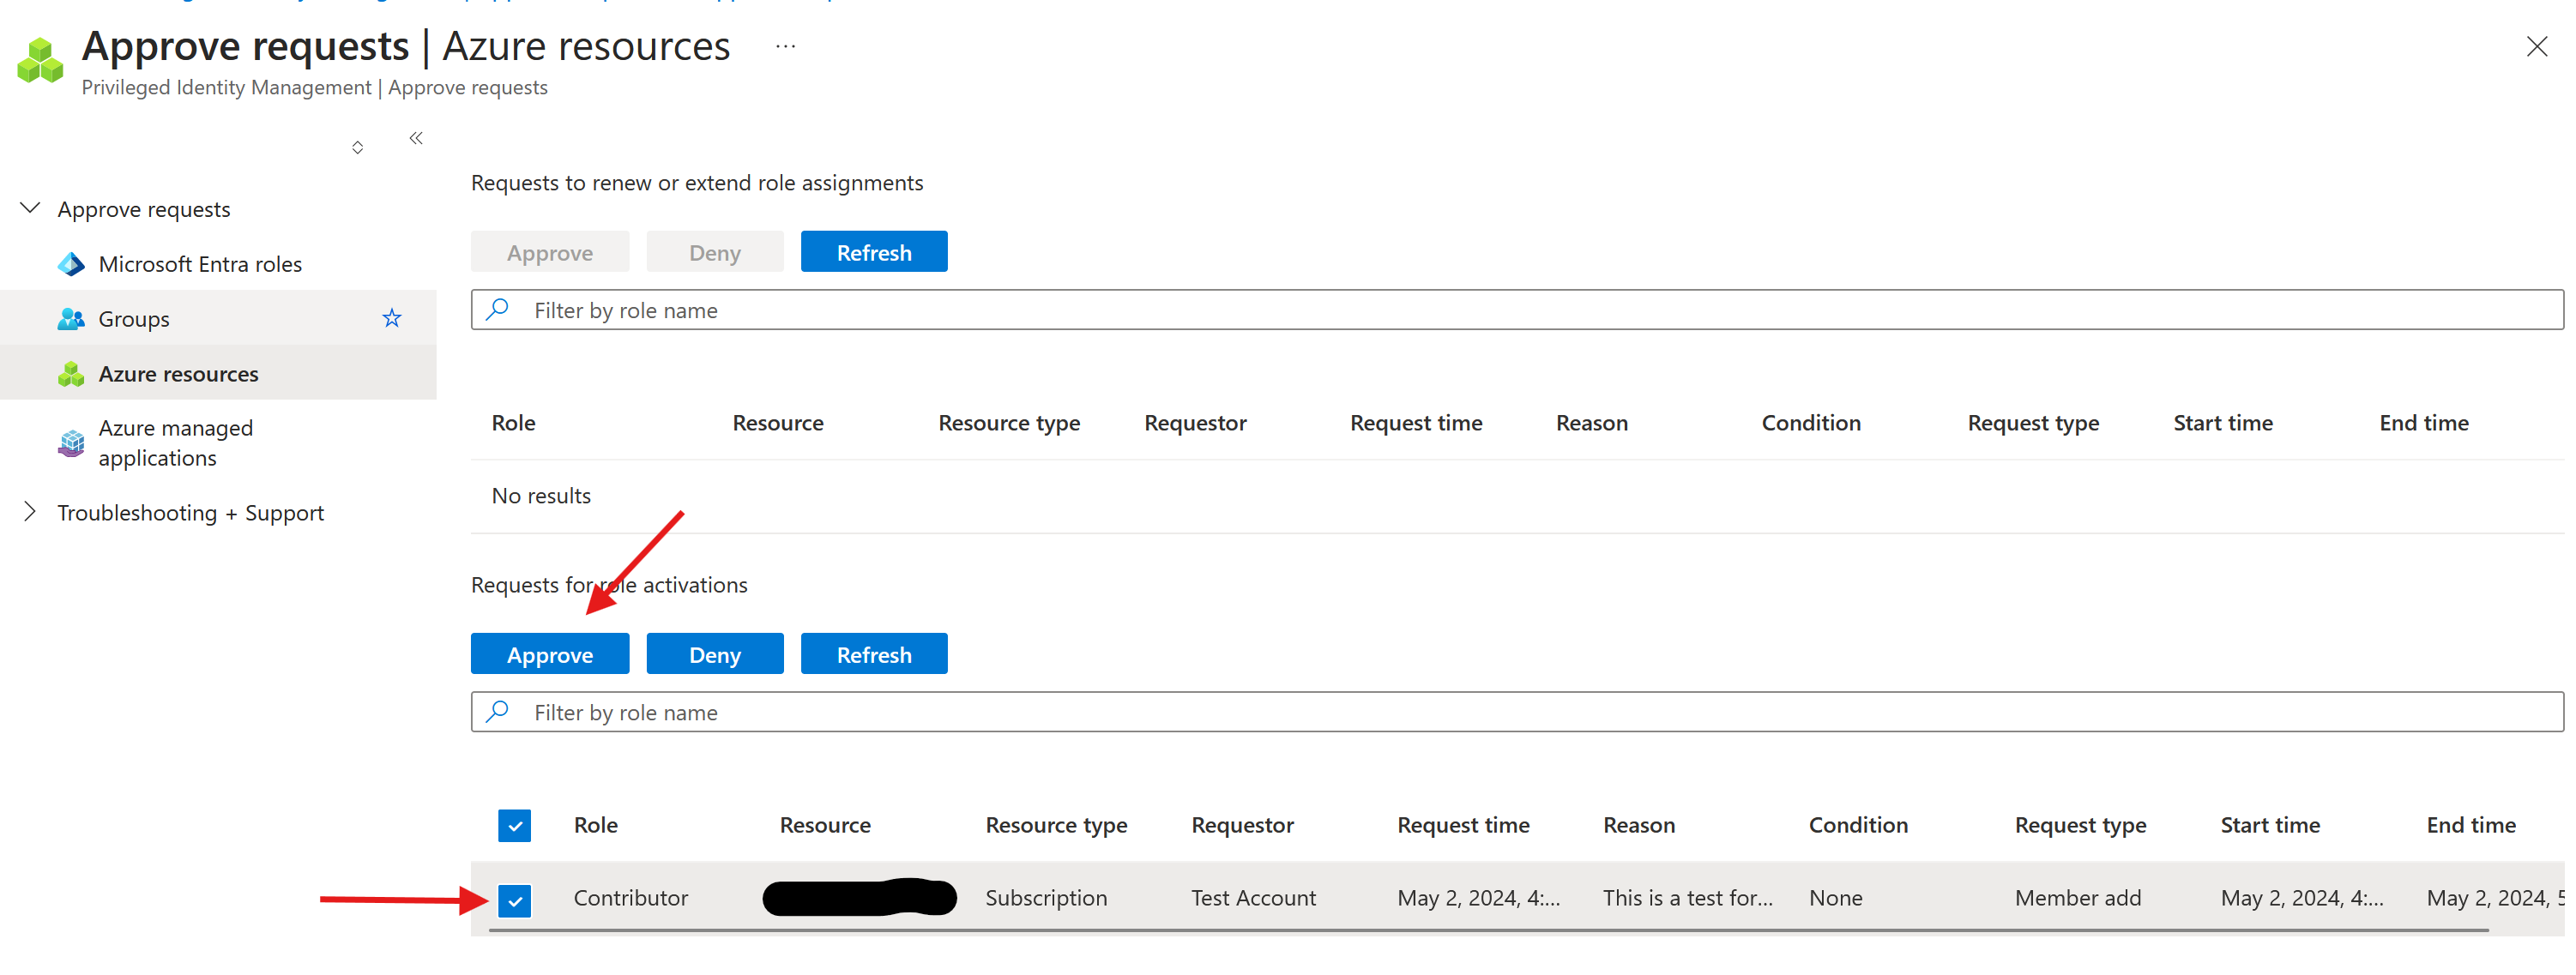
Approver
As an approver, start the approval of the PIM request by selecting the request and clicking ‘Approve’:
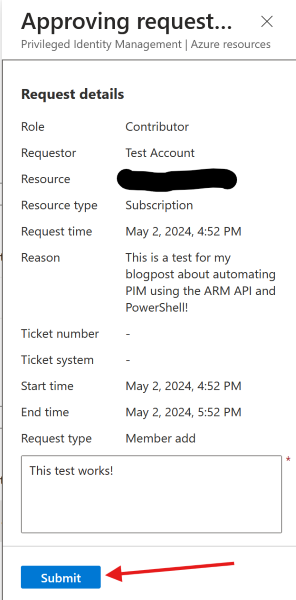
Finally, check the request and if it meets requirements approve it with a justification:
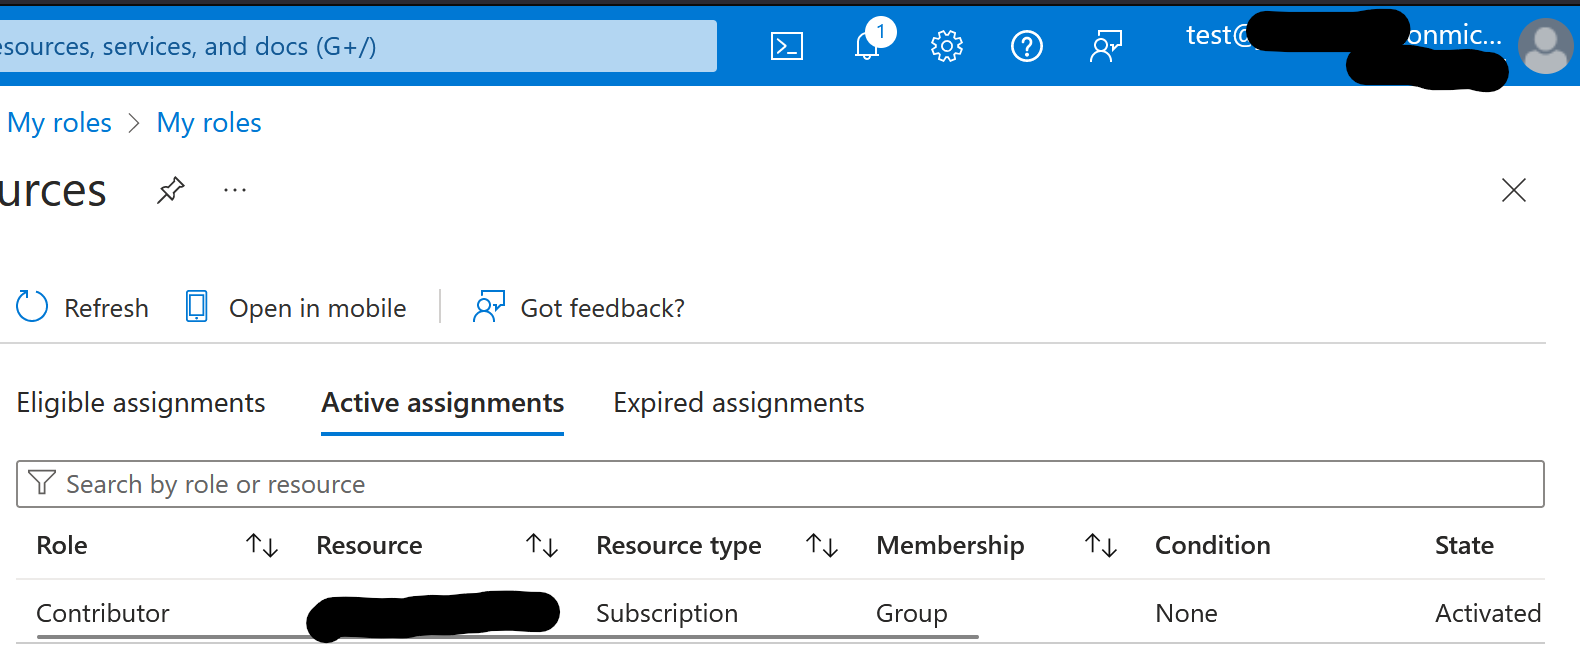
Validate
Validate if the requesting user has an active role assignment under ‘My Roles’ in Privliged Identity Management:
Conclusion
That concludes this blog about configuraing PIM via the ARM API with PowerShell. We have successfully:
✅ Created 2 new security groups. 1 for PIM requests, 1 for approval of requests
✅ Wrote a basic function to obtain headers that we used for making API calls
✅ Updated a role policy with a custom role settings
✅ Assigned the eligible role to our Security Group
✅ Successfully tested the workflow 🔐
With PIM now in place, your organization gains precise control over permissions, enhancing security and compliance. Hopefully this post provided you with some guidance on how to automate PIM in your environment. Good luck and feel free to reach out if you have any questions! 🚀